
I got this microscope illuminator a while back and wanted to share some things about it. Mine came as is, without power supply nor any filters. It did however come with the tungsten lightbulb, which is nice since those things alone are expensive to get.
Optical design

The optical design consists of a convexconcave and a biconvex lens, followed by a diaphragm and an optional filter. According to the instruction manual the aperture is 0,67.
From my own measurements: the filter mount accepts square filters of 4,4x4,4cm in size with a maximum thickness of 4mm. The internal diameter of the diaphragm opening is 32mm at maximum.
Common Problems
Fixing the Diaphragm
On mine the diaphragm was hard to operate and had a slimy feel to it, this was due to grease that started to get sticky. In order to fix this I carefully disassembled the diaphragm, cleaned all pieces with Ballistol put it back together. Finally I applied very small amounts of lubricant with a watch oiler. The oil will eventually dry but at least won’t end up sticking it just won’t be lubricated anymore in the worst case, which is no problem since you can just oil it again.
To disassemble the diaphragm, unscrew the three screws around the diaphragm and lift the black piece up carefully.

Carefully remove all pieces of the diaphragm and clean them, then put them back together. Word of warning: Putting them back together can be quite frustrating and time consuming.
Lamp socket problems #1
The lamp socket needs to be put together as shown, with the indents lining up and gripping in. Otherwise the light bulb will not make contact to the two spring contacts.


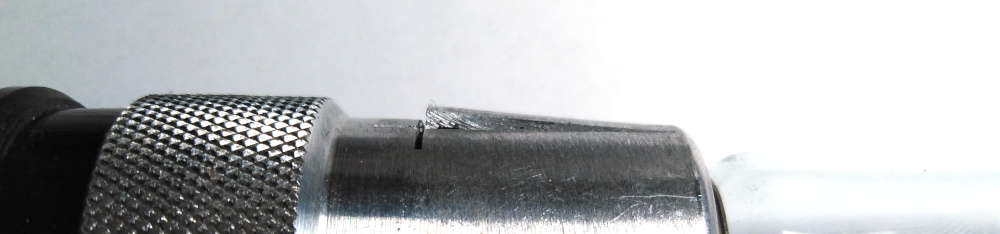
Lamp socket problems #2
The piece that has been cut out of the clean aluminum part needs to be slightly bend outwards, otherwise the lamp assembly can easily fall out of the lamp (and potentially damage the light bulb). To do this, remove the light bulb and unscrew the clean aluminum part. Then use a screwdriver or something to press the part out be careful not to damage the screw threads.
Connector
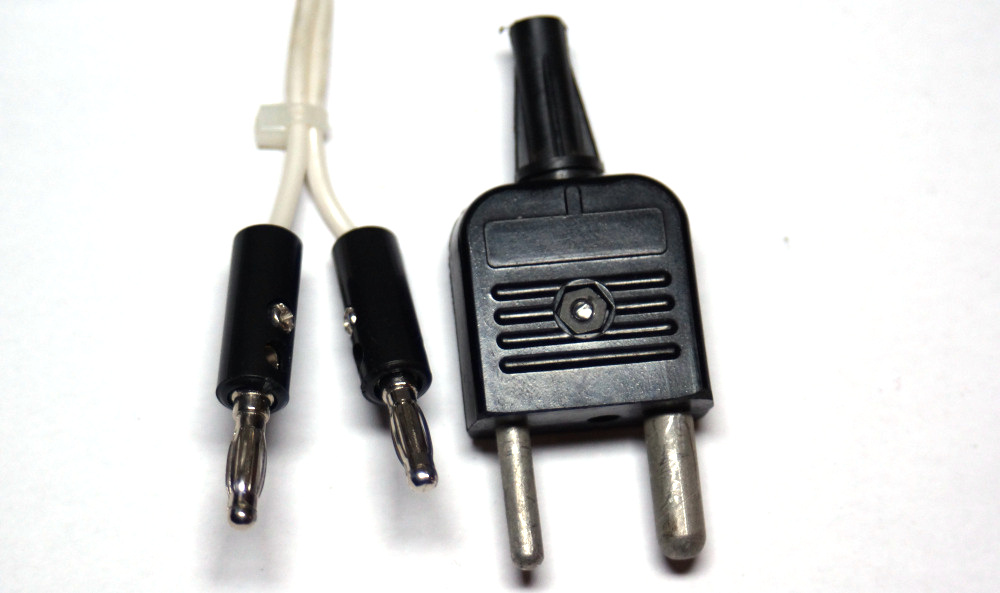
I did not have the original power supply that came with the illuminator, so I replaced the plug with two 4mm banana plugs. Since 6V 20W tungsten lamps were fairly standard for microscopes of the time, any AC power supply matching this specification works, usually those transformers have 4mm banana sockets or something compatible. In my case I’m using an old AC microscope lamp transformer from “micro-optik-münchen” I got a while back.
(I kept the original plug in case I ever want to put it back into it’s original shape)
Filter Template
I made this filter mount template for 3D printing. This assumes one unit is 1mm.

Download: STL
OpenSCAD Code:
difference() {
  translate([-22,-22,0]) {
      cube([44,44,3]);
  }
  translate([0,0,-1]) {
      cylinder(h=5,r=16);
  }
}
Links
- ОСВЕТИТЕЛЬ ОИ-19 - scopia.ru
- Mikroskopfreunde Nordhessen (See LOMO section)