
So I got this 1960’s Singer Model 347 sewing machine the other day.
The motor of the machine was audibly struggling unless on full power, which indicates dried up grease or other high friction going on inside the machine. Who knows how long this had been sitting around unused. So I figured I’ll give it some servicing first before I do anything with it.
Getting the manual
My first expectation was that I would need to search and track down a scanned manual on the internet. This expectation was immediately shattered, as it turns out the manual is available on the Singer documentation library. However whilst initially searching for the manual on the internet, I also found a mechanical parts breakdown for service technicians. So that’s more than enough for me.
Servicing
Use the lubricants as specified in the manual unless you know exactly what you are doing. So in this case the standard lubricants would be the Singer lubrication oil and Singer grease. However I know exactly what I’m doing to so I’m going to use substitutes I happen to have around, I’m not going to mention what I’m using here as I don’t want to be liable in case anyone messes their sewing machine up.
Needle Presser and Bed Assembly
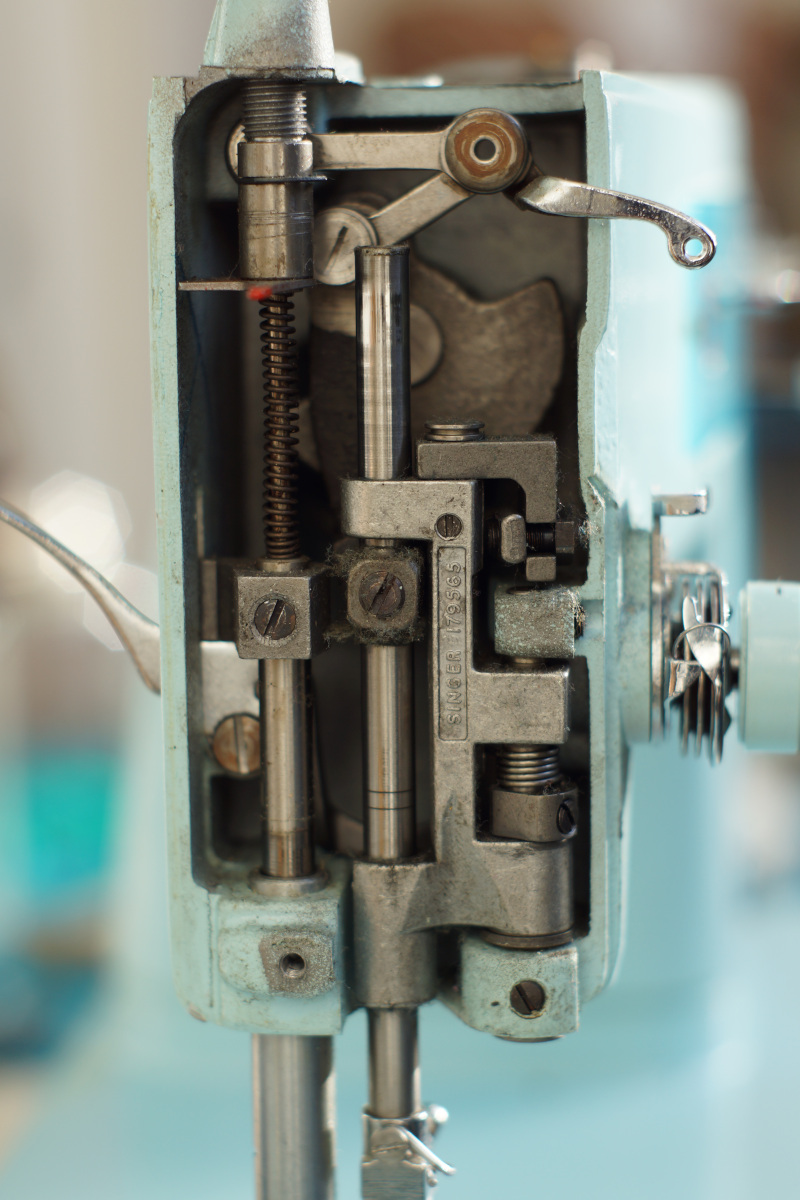
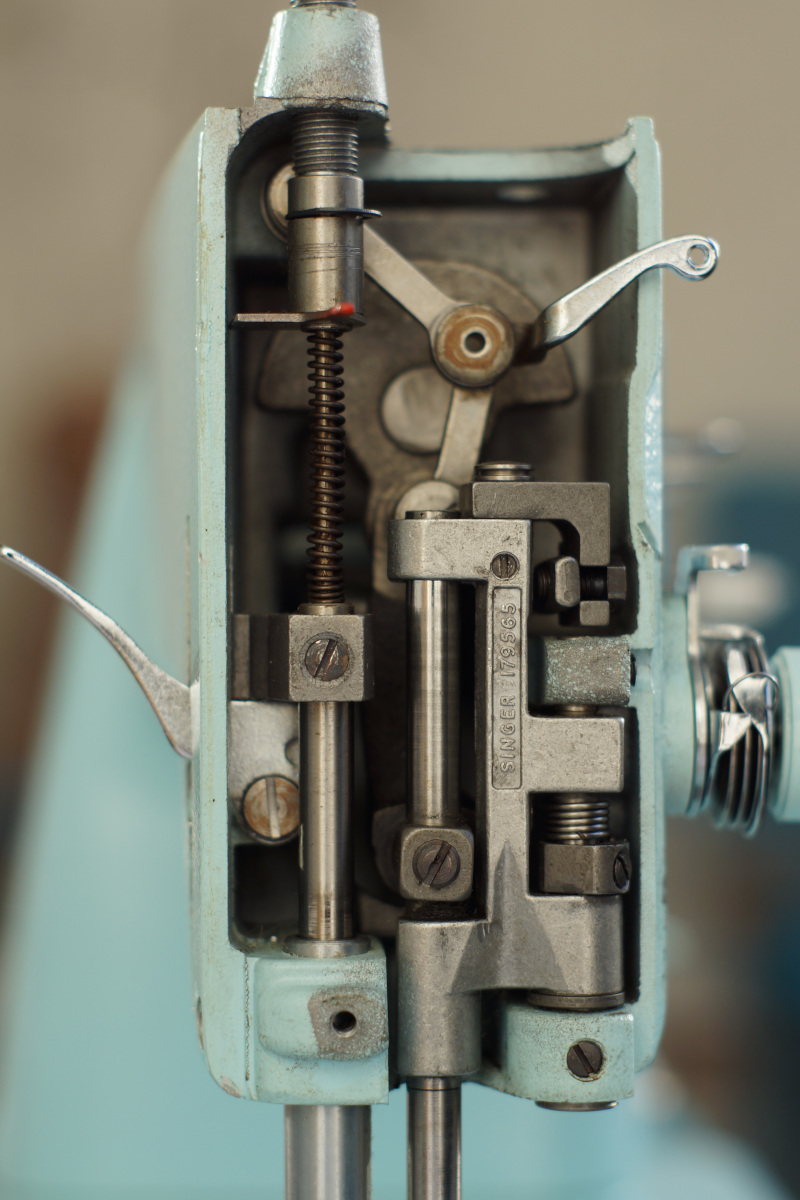

Same procedure on both, I’ve opened them up cleaned any fleece out with a brush and added lubrication oil to the designated spots as given in the manual.
Gear Lubrication

The whole machine smelled like nidorous grease, a dead sign that we have some nasty grease somewhere. And behold the gears were covered in a nasty grease sludge.

So I cleaned the old grease off as well as possible without having to disassemble the whole machine. I carefully used some brake cleaner (i.e. as to not getting it on any plastic parts) to break that stuff up.
I then applied new grease to the worm gear and bevel gears. Furthermore from this side I also applied oil to the positions as specified in the manual. Though the manual shows the oil points through the cover plate which has lubrication holes, I added the oil directly to the corresponding parts as they were completely dry. The Belt didn't looked like all to well but as long as it's not falling apart I'll leave it as it is.
After this, the machine rotated way more easy and freely.
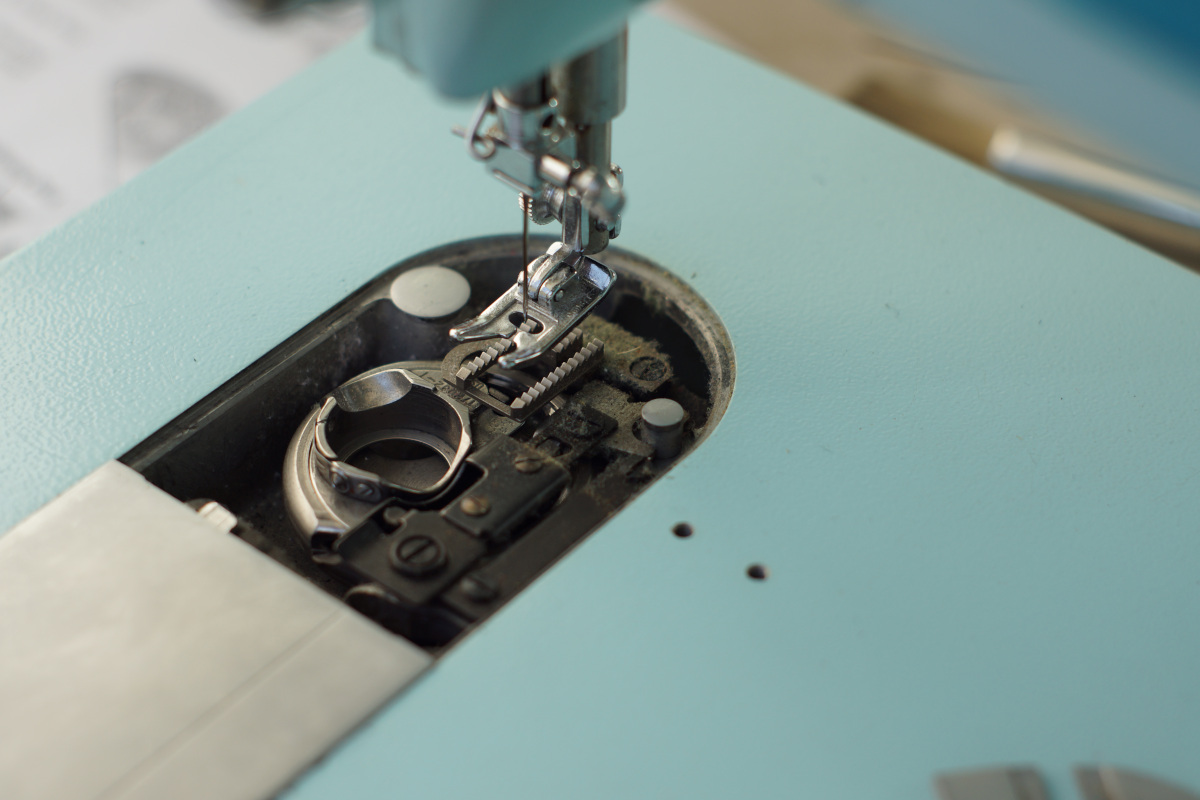
Bottom side

I did nothing worth mentioning on the bottom side, I cleaned the inside around the timing belt and lubricated the spots as specified in the manual with oil.
The plastic feet have deteriorated quite a bit, the screw has a shank with a width of 4.85mm. I'll get some new suitable plastic or rubber feet and make them fit on the original screws. I don't ave my thread gauge at hand right now so I couldn't check the thread size of that screw, though I assume it's a standard imperial screw with a UTS ow BSW threading.
General cleaning
To clean and disinfect the machine I used 70% isopropanol (2-propanol; C3H8O).
Test
I gave the machine a test run on some scrap fabric and it felt and sounded a lot more healthy than before.