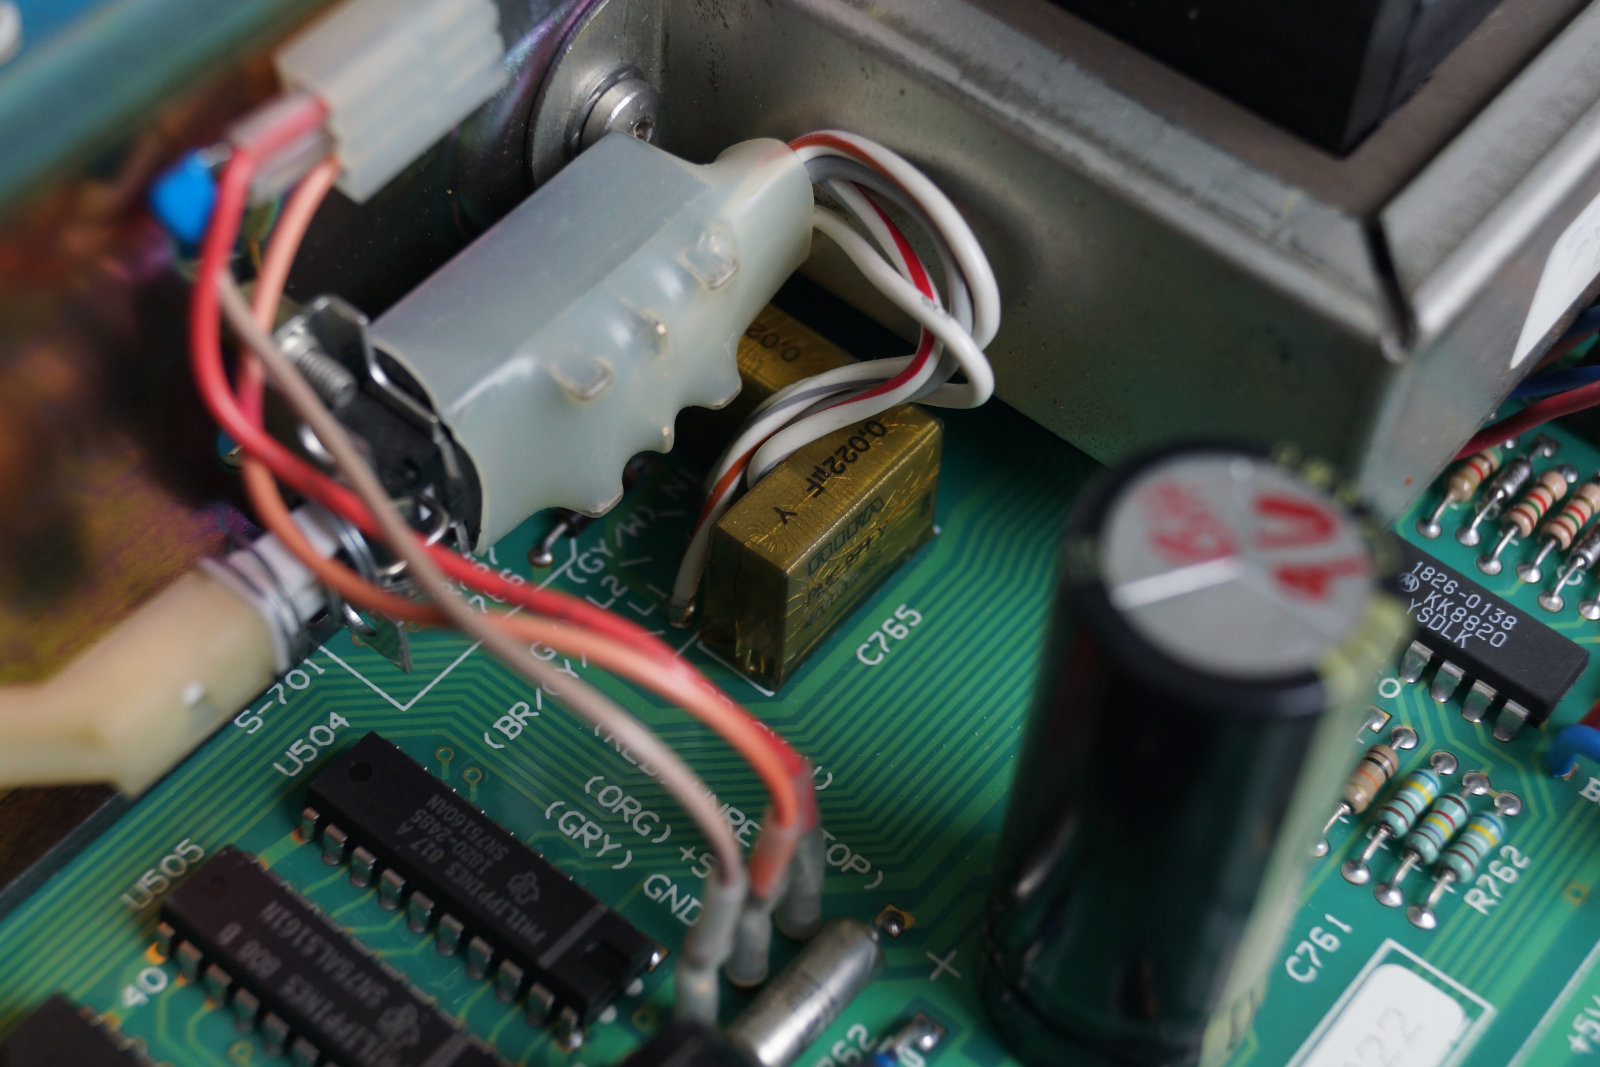
Replacing the old RIFA capacitors
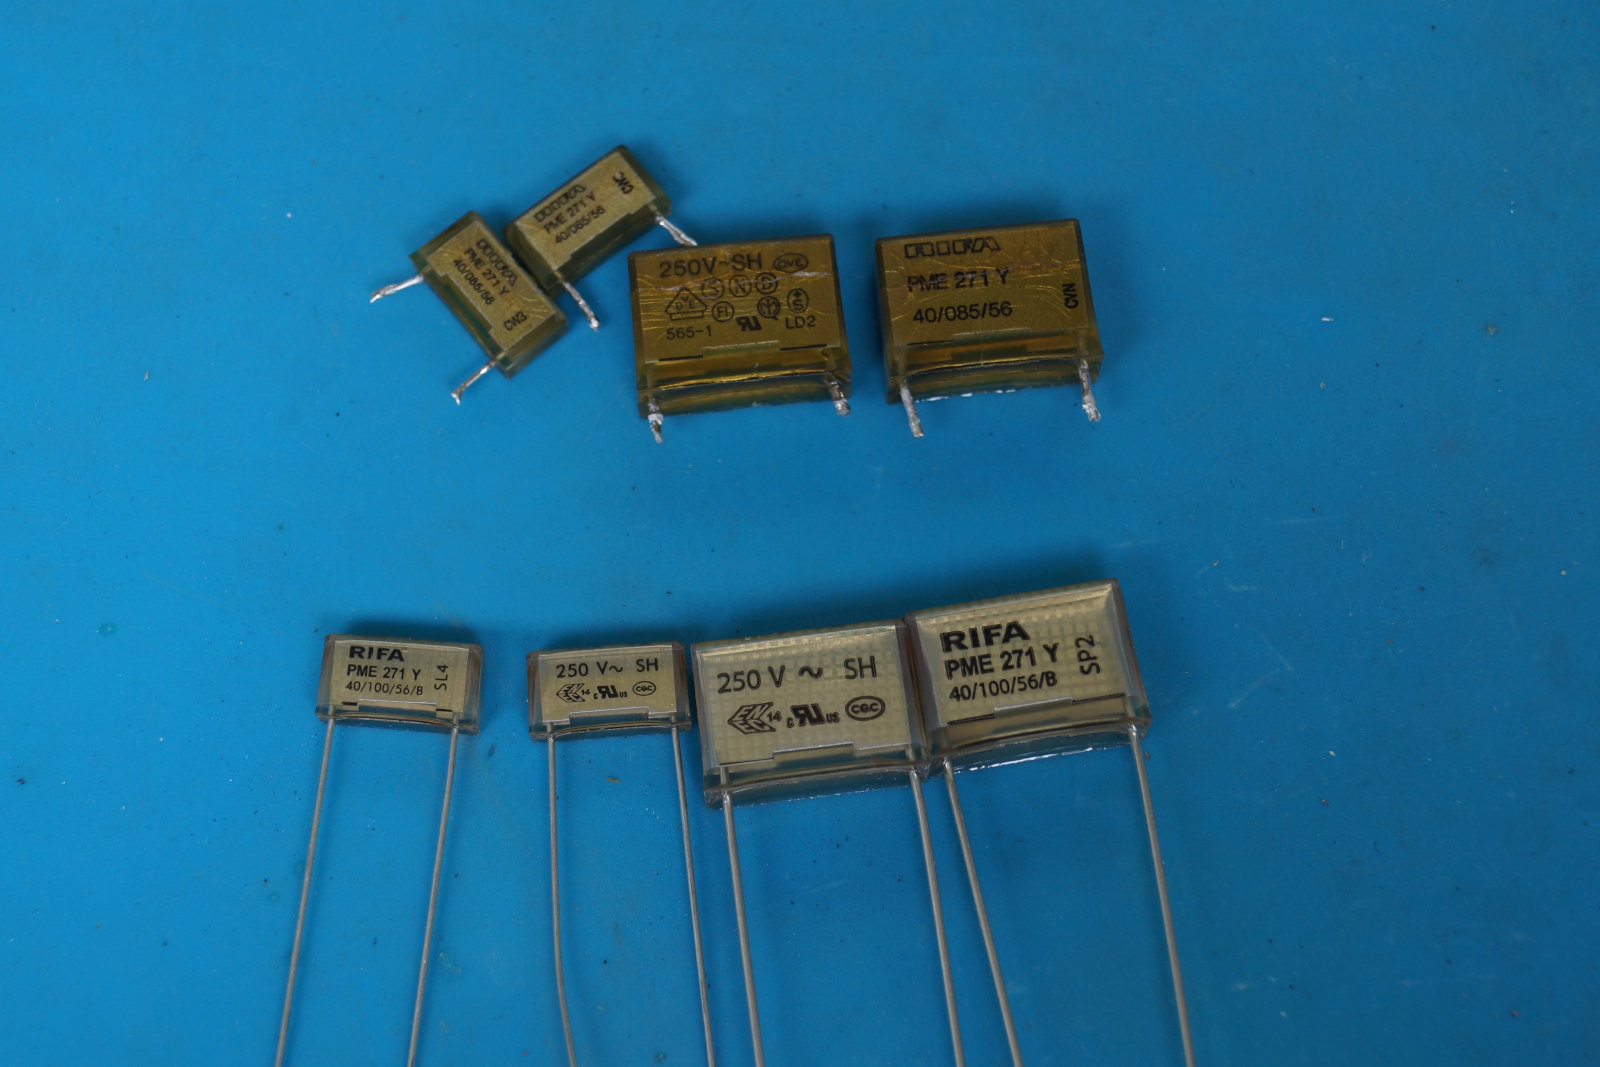
Older RIFA capacitors are known to crack, which results in moisture getting into them which subsequently lowers the internal insulation resistance which at some point results in catastrophic failure. I had a couple of those explode on me in the past.
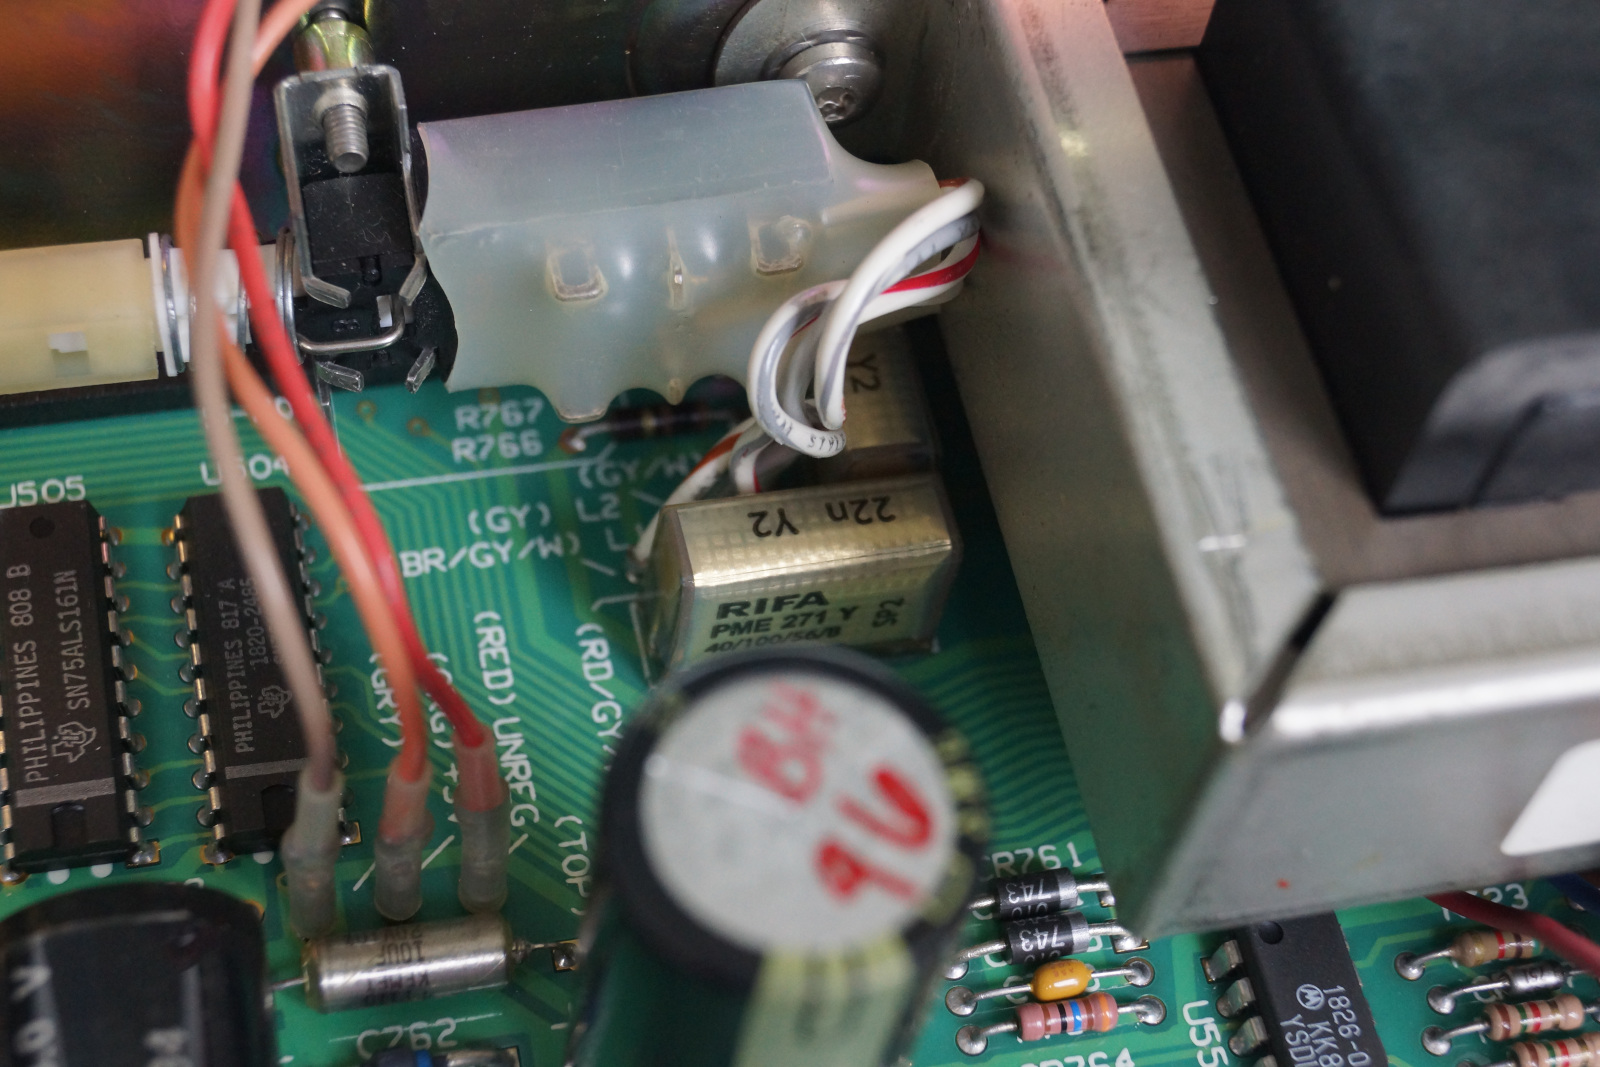
On the HP 3478a the RIFA capacitors are mounted before the mains switch meaning that they are live whenever the multimeter is plugged in. Which means that unless those have been replaced I would not leave the meter plugged in without supervision.
My electronics supplier only had RIFA’s (albeit new ones of course) in the values and lead spacing required available. However
the specifications of those RIFA capacitors vastly improved over time, the current series are no longer comparable to the old.
Furthermore replacing them this way makes the meter more “genuine” to me since I somewhat maintain the original component choices.
The codes of the RIFA capacitors needed are PME271Y522MR30 and PME271Y410MR30.
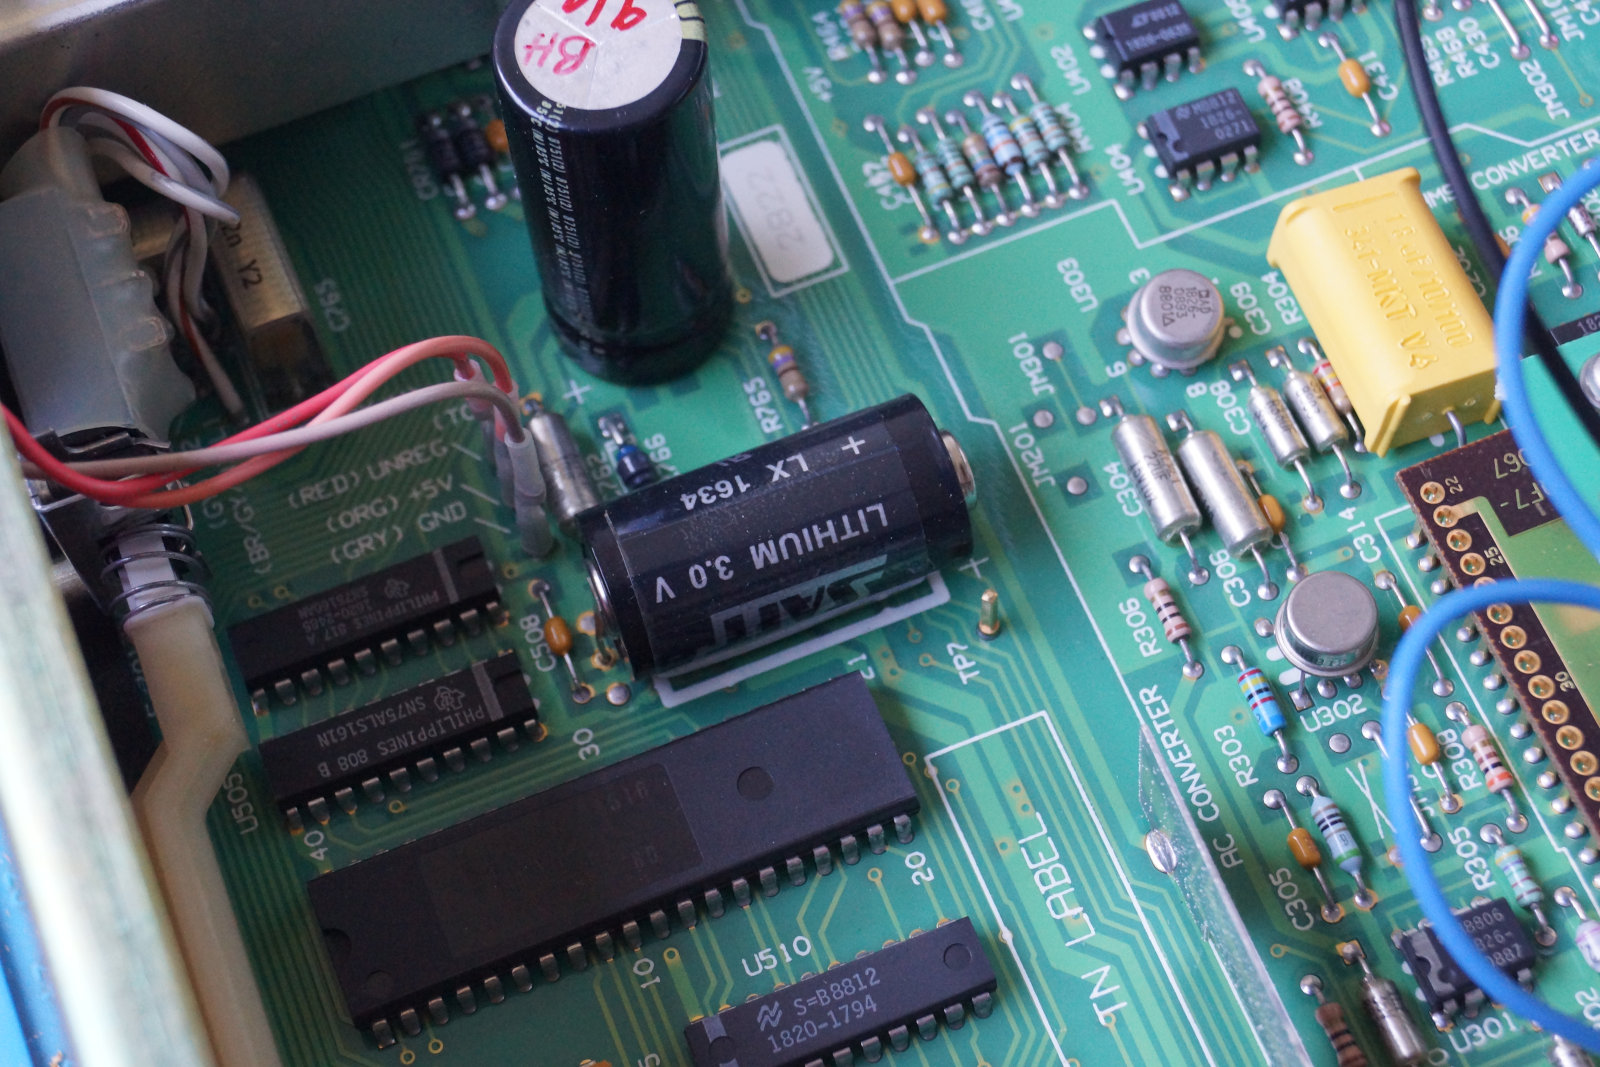
Battery replacement
The HP 3478a uses s battery buffered SRAM for the calibration values. Even with a short power loss the calibration of the meter will be lost and
recalibrating it requires specialized equipment.
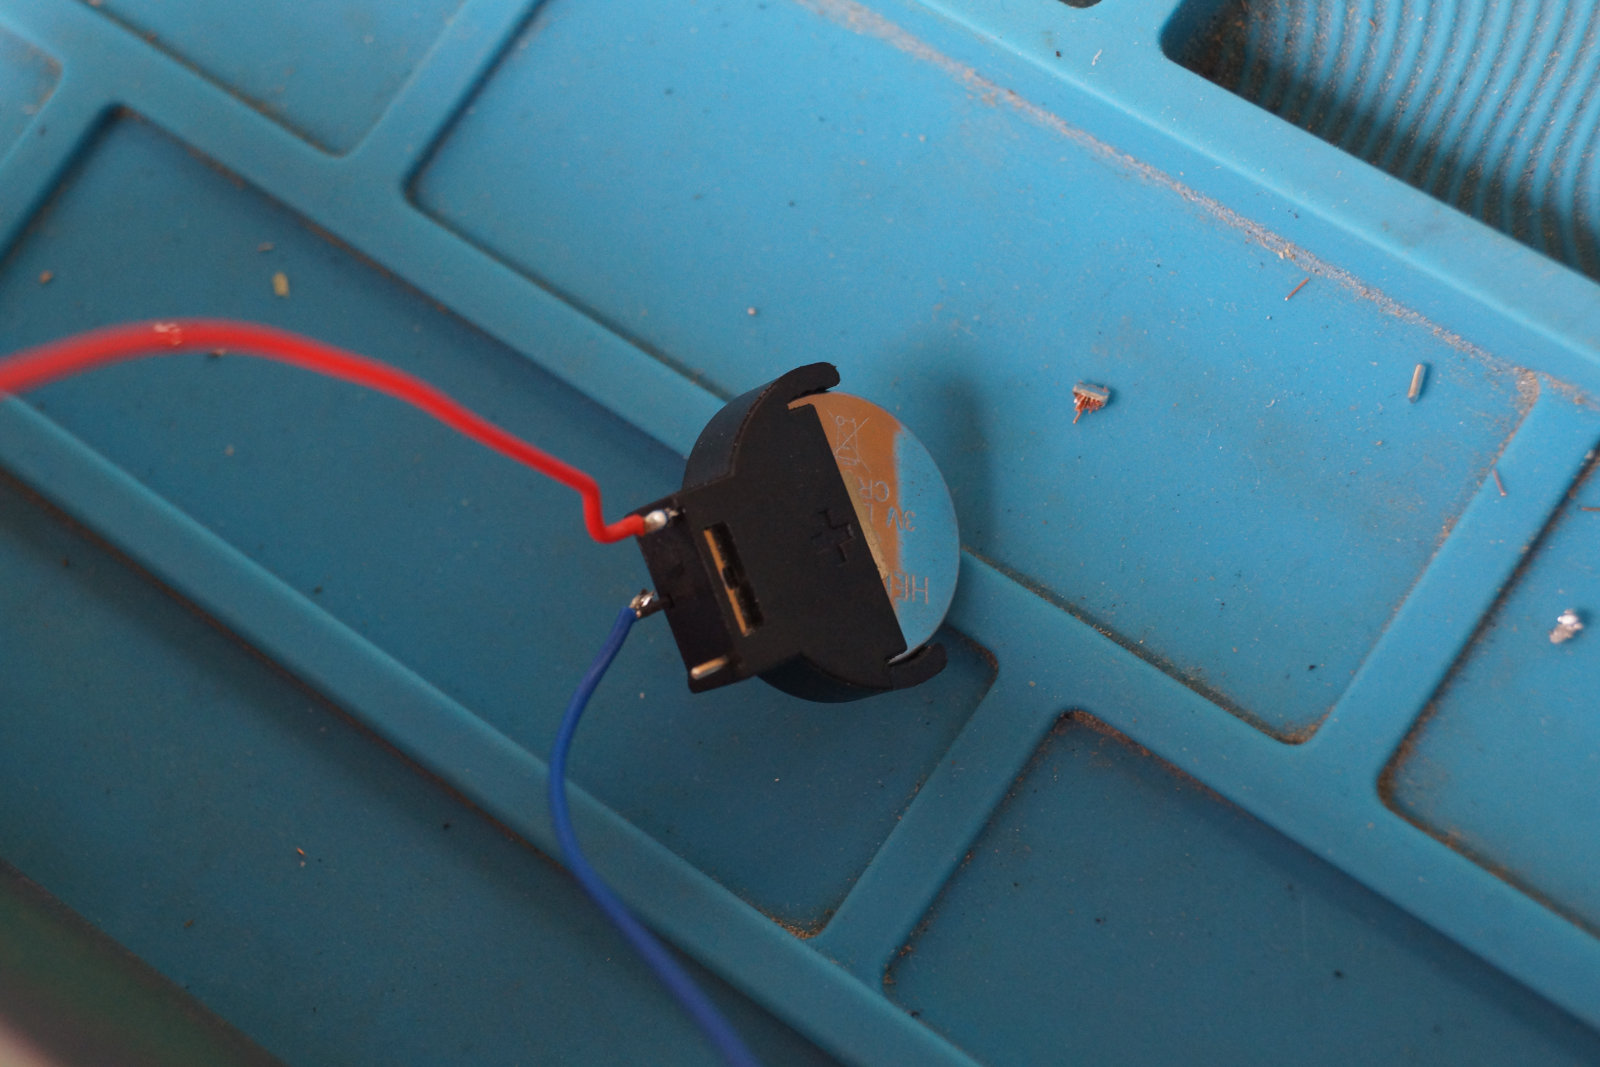
The lithium battery that buffers this SRAM is generally old and needs to be replaced. I replaced the original (?) SAFT LX1634 it with a FDK CR17335SE-FT1.
Since the SRAM needs power continuously including during the battery swap, I attached a button cell:
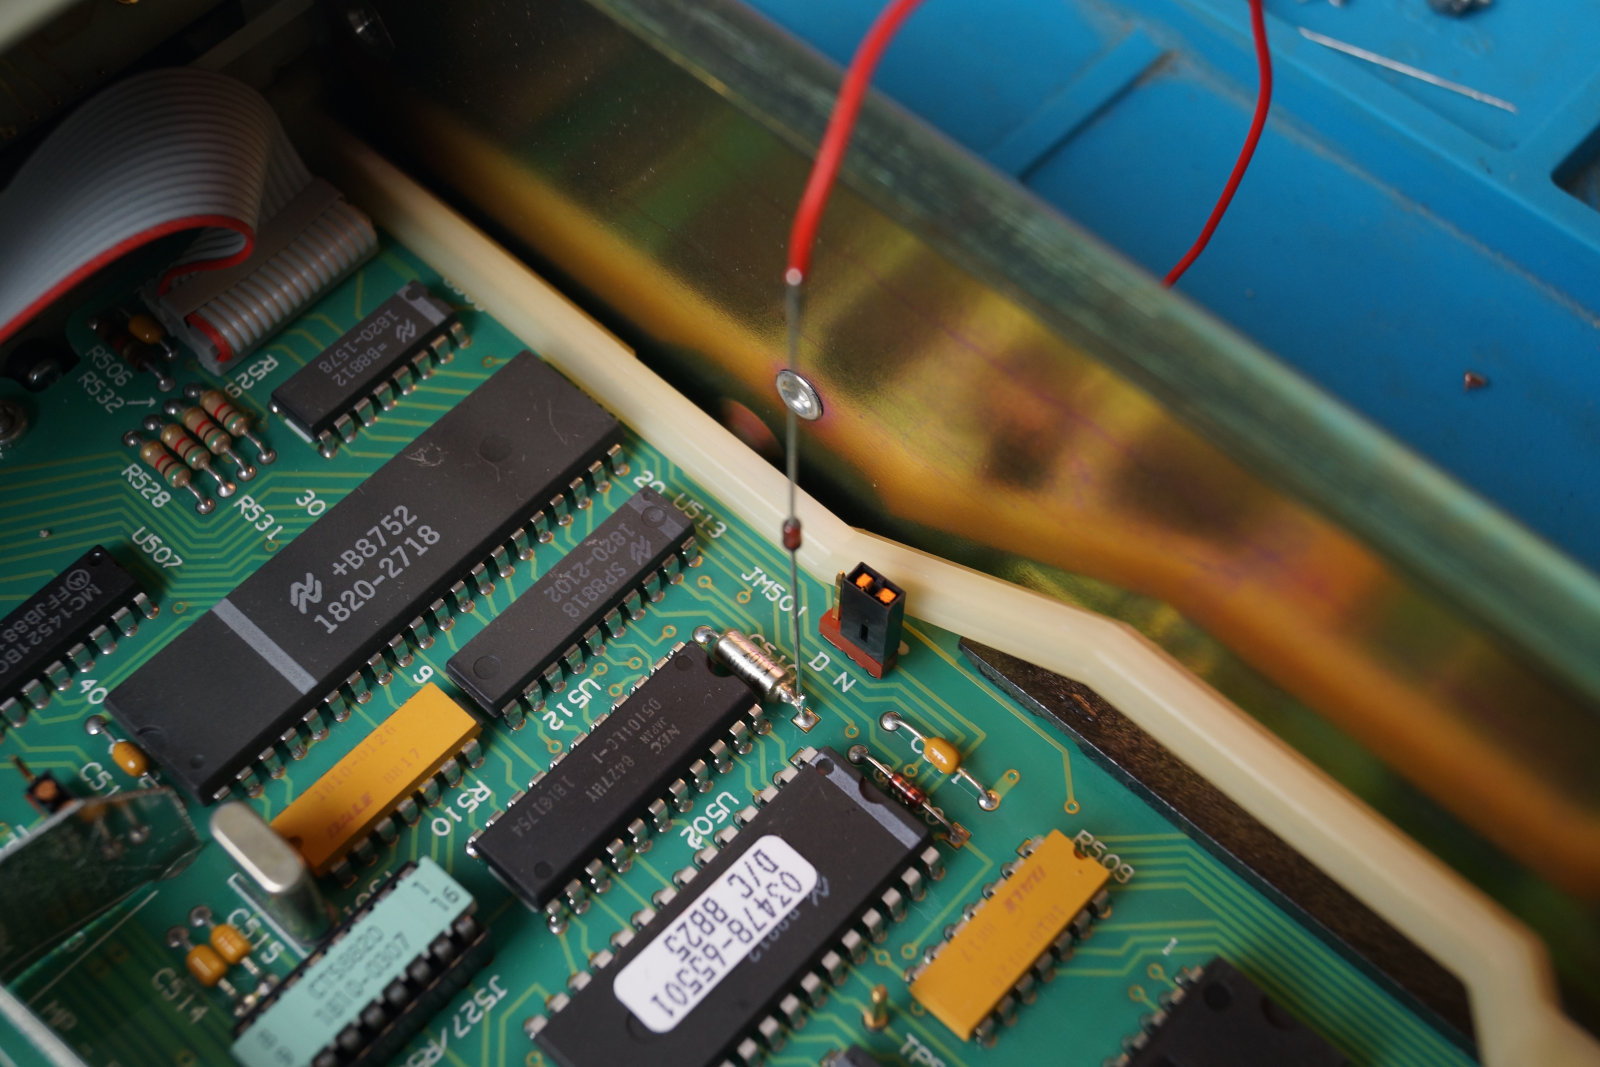
I furthermore decided to swap the battery while the multimeter is plugged in and powered on which is dangerous as there is mains voltage present on the board. DO NOT REPEAT THIS, IT’S STUPIDLY DANGEROUS.
The digital 0V is connected to chassis ground, so I heated up my soldering iron and unplugged it before touching anything in the meter in order not to accidentally short out a rail and cause the SRAM to lose it’s power.
The new battery did have a dual lead on the + side, whereas the PCB only had vias for a dual lead on the - side of the battery. So I first soldered a single center lead onto the + side and snipped off the two others.

I then proceeded to swap the battery as explained above. I used my label printer to add a date code to the new battery, so the next person servicing this (or me in a decade) can see when the last replacement was done.